|
| All Models: The Hilux Surf as sold in Japan is fitted with a speedometer that reads in KPH (Kilometres per hour). When converting the vehicle to UK standards the Speedo face is usually replaced with one that indicates the correct speed in MPH. The odometer however remains in Km, if your ‘miles’ appear to be clocking up too quickly, it’s probably because they are actually Kilometres.
Back to Index
All Automatic Models: Pressing this allows you to move the gear lever out of park without turning the ignition on.
Back to Index
All Automatic Models: This stands for Electronically Controlled Transmission and changes the operational mode of the automatic gearbox, comparable to sport mode on most auto boxes as it holds on to each gear for longer. ECT light illuminates on dash when selected.
Back to Index
All Diesel Models: This increases the idle speed. Useful when warming up the vehicle in very cold weather, powering a winch or jump-starting another vehicle. On some vehicles this will only operate when in park and/or neutral.
Back to Index
All Automatic Models: The automatic surfs are fitted with a 3-speed plus overdrive gearbox, effectively a 4-speed gearbox. By turning the overdrive off ("O/D off" light is illuminated on 2nd & 3rd Gen clocks, above stereo on 1st Gens) you will prevent the transmission from selecting top gear. This also causes the torque converter to lock up earlier, at around 42 to 44 mph (normally it locks up at around 52mph). This can be useful for example when climbing steep hills, particularly when heavily laden or towing.
In normal use to ensure best longevity and economy the overdrive should be left engaged (i.e. dash light off).
Back to Index
2nd Gen: The first thing to note is that this is a part-time 4wd system.
The vehicle is not fitted with a centre differential and therefore 4wd must never be used under normal conditions on surfaces with a high level of grip. Using 4wd on tarmac under normal condition will cause transmission wind-up and may result in damage to the drivetrain of your Surf.
H2: Rear wheel drive only: Normal operation.
H4: 4 wheels driven: Press red button on side of 4wd selector. Indicator will illuminate in centre of dash when fully engaged. You may select/deselect this mode at speeds up to 100Kph. Must only be used on loose surfaces such as mud, snow etc.
L4: 4 wheels driven, Lo-Ratio engaged: Select neutral on main gearbox, move 4wd selector lever fully back (position of button on side not important). Must only be used on loose surfaces such as deep mud, sharp inclines, descents etc where there is both a loose surface and a requirement for additional torque, lower speeds etc.
3rd Gen: The 3rd Gen Surf has a multi-mode 4wd system.
It may be used in 2wd Hi-ratio, driven by the rear wheels only, 4wd Hi-ratio with an open centre differential. 4wd Hi-ratio with the centre differential locked and 4wd Lo-Ratio with the centre differential locked.
H2: Rear wheel drive only: Normal operation, best for less wear & tear on components, best fuel economy & performance.
H4: 4 wheels driven, open centre differential: Press red button on side of 4wd selector. 4 wheel Indicator will illuminate in centre of dash when fully engaged. You may select/deselect this mode at speeds up to 100Kph. May be used anytime extra traction is desired
H4L: 4 wheels driven, centre differential locked: Move 4wd-selector lever fully back (position of button on side not important), 4 wheel Indicator and centre diff light will illuminate in centre of dash when fully engaged. You may select/deselect this mode at speeds up to 5Kph. Must only be used on loose surfaces such as mud, snow etc.
L4L: 4 wheels driven, centre differential locked, Lo-Ratio engaged: 4 wheel Indicator and centre diff light will illuminate in centre of dash when fully engaged. Select neutral on main gearbox, move 4wd selector-lever fully back, push to the right and then forwards.
Back to Index
All Models: Most Surf’s will come fitted with some form of stereo system, often a very attractive and well featured one, however all is not always as it seems.
The Japanese stereos tune in a different range of frequencies to those used here so will max out too soon, preventing you from receiving the full range of stations. Additionally they broadcast on odd numbered decimals e.g. 88.5 or 92.3 etc, whilst here we use even decimals such as 98.2 or 104.4 etc. This means you will rarely fully tune in a station, but usually tend to be off just a bit.
A band expander can be fitted to shift the tuning range upwards, in theory allowing you to receive the full range of stations, however many cannot compensate for the difference between the odd and even decimal tuning, so whilst the full range may be obtained reception quality often remains low.
Another difficulty with the expanders is that the display will not accurately reflect the actual frequency being received. Whilst some have had good success with such band expanders, the vast majority have eventually resorted to ditching the original stereo in favour of one designed for this market. See here for how to ditch that stereo.
Back to Index
All Models: Some Surfs come fitted with a sat-nav system, sometimes combined with a TV tuner (more on that below) which many new/prospective owners’ view as a terrific asset. The reality is somewhat different. The short answer is you don’t. To date nobody has managed to get a mapping disc for this part of the world, which is compatible with the Japanese spec sat-nav systems as fitted to the Surfs.
Back to Index
All Models: Many Surf’s come fitted with a TV system which may initially seem a fantastic thing to have. Unfortunately, as with the stereos and the sat-nav, it’s not as great as it seems. The Japanese use the American NTSC broadcast system for its TV signals, whilst here in Ireland/UK we use the PAL system. Whilst it is possible to get adapters to convert incoming PAL to NTSC to enable use of the TV system it is not economically viable. Some systems however include multi-region DVD players, these may still be of use if you can obtain NTSC discs. You can also usually use the displays to monitor cameras (NTSC) you may fit, e.g. a reversing camera.
Back to Index
2nd Gen: There is an excellent guide to changing the stereo available at installdr for the 2nd Gen models, it is for a LHD US 4Runner but perfectly applicable to the Surf. Click here to view it. Wiring adapters to connect an ISO standard stereo to the Toyota loom are available from the Hilux Surf shop.
3rd Gen: To change the stereo on the 3rd Gen, first remove the two screws from the base of the storage area under the front armrest. Remove the two screws from the front edge of this console where it meets the next section, level with the front of the handbrake. Slide this section rearward about an inch. The section surrounding the gear levers may now be lifted up at the rear edge and pulled rearwards an inch or two. Next pull of the two slider knobs on the heating control panel, the fascia on this heating control panel must now be removed, this is tricky as it is quite fragile and must be prised off, behind this two screws are now visible, remove these. The centre section of the dash may now be removed, grasp the lower edge and pull rearward a few inches, the wiring to the cigar lighter, ashtray, clock, hazard and HRW switches can now be disconnected. Lift the panel clear and you can now access the radio mounting brackets. The stereo may now be changed, if required reference can now be made to the directions given above for the 2nd Gen, as the mounting method and wiring are the same. You may skip to step 16 of the Remove and Install section. Don’t forget the same wiring loom from the Hilux Surf shop will greatly assist in achieving a professional installation.
Back to Index
All Diesel Models: This will light up every 100,000Kms to remind you that your timing belt must renewed. The belt must be renewed when due as failure of the belt can lead to severe and costly damage to your engine. Do not reset the warning light until the belt has been renewed.
To reset the light various methods are employed for the different Generations as listed below
2nd Gen: On these models there is a rubber bung in the perspex on the clocks. Remove this and using a slender object such as a pencil you can push the reset button.
3rd Gen: On the 3rd Gen it’s somewhat more complicated.| Where conventional dials are fitted, use the following procedure. | 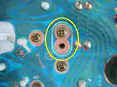 |  Remove Dial/Clocks assembly. (Refer to suitable manual) Remove Dial/Clocks assembly. (Refer to suitable manual) | | At the rear you will find a location where there are two screw holes with a screw fitted to only one of them. Remove this screw and insert in the alternate location hole. | | Replace the dials assembly. | | | | | | | Where Optitron (Lexus style with digital odometer) dials are fitted, use the following procedure. | | Set the digital display to ODO | | Turn off IGN | | Holding the TRIP reset button, turn on IGN | | Hold TRIP for 5sec. | | The digital display will show "1" | | Pressing the TRIP will advance the number 1, 2, 3, 4 etc... | | Each represents 10,000k. So 10 = 100,000 | | When you get to "10" press and hold TRIP for 5sec. | | Display resets back to the ODO reading | | Turn off IGN and then back on. |
Back to Index
All Models: If you have found a red cylindrical object either in your glovebox or clipped to the side of the passenger footwell, don’t play with it. This is an emergency roadside flare carried in Japanese vehicles. These are not permitted in vehicles in the UK/Ireland and should have been removed before sale, so please hand it into your nearest Police/Garda station and they will dispose of it in the correct manner. You should never attempt to dispose of or use the flare yourself, this contains explosive elements which may have become unpredictable with age, please pass on to the authorities as soon as practical.
Back to Index
All Models: A disconnected or broken wire in the tailgate often causes this. Remove the inner panel and examine the wires connected to the window (you may have to lower the window slightly to do this). One or more of these wires may have become disconnected from the glass, or the wire may have broken either at the connector or further along its length.
Back to Index
1st Gen: Some 1st Gen Surf’s have a bell that begins to chime if you go over approx. 65mph, for details on disabling it look here.
2nd Gen: Some 2nd Gen Surf’s have a bell that begins to chime if you go over approx. 65mph, for details on disabling it look here.
3rd Gen: As yet there are no known occurrences of this bell on the imported 3rd Gen models.
***EDIT 27/07/06*** It can be found on a 3rd Gen! Marky in the UK has just encountered this, as soon as he gets it removed, I hope to be able to ad the details here.
Back to Index
All Models: This can be opened either from the switch in the cabin, or by using the key in the tailgate.
Back to Index
2nd & 3rd Gen only: It’s for your suspension.
Some models have adjustable suspension fitted. This permits the selection of two settings, hard and soft. This does not affect the springs or the load carrying capability of the Surf, but alters the dampers response. Some users advocate using soft on the road and hard for off-road, others use the hard setting when the vehicle is laden, or at motorway speeds, whilst others prefer it permanently set to hard. Eventually, it comes down to your own personal preferences. When the dampers (usually incorrectly referred to as shock absorbers) require replacement, aftermarket non-adjustable types are normally fitted as this is the most economical solution and permits an upgrading of the dampers.
If your hard/soft button does not appear to have any effect, it may be that the dampers have been changed to non-adjustable ones.
Back to Index | |
|
Copyright © 2005-2013 |
