|
| 1st Gen: Standard size on earlier models is thought to be 225/75/15
Also seen with 30x9.5x15 sizes on some later 1st Gens
2nd Gen: Standard sizes on narrow-body models is 215R15
Standard size on wide-body models is 265/70/15. Factory option is 31x10.5x15
3nd Gen: Standard size on 2wd models is probably 235/60/16
Standard size on 4wd models is 265/70/16.
Back to Index
All Models: This one is a bit of a grey area, there are official figures available which vary depending on the size of tyre originally fitted. Check for a sticker inside the drivers 'B' pillar (the 'B' pillar is the section of bodywork between the front and rear doors
Most owners do not find the recommended figures suit them particularly well and experiment to find the pressure that best suits their particular set-up (vehicle/tyre size/tyre make/driving style etc).
A good starting point is around 32psi all round. Starting with this try increasing/decreasing by 1psi at a time until you find the setting that suits you, most owners tend to settle between approximately 31 and 35psi
Remember, always check your tyre pressures cold. This means either after the vehicle has been sat for a few hours (preferably out of direct sunlight). Even from cold, anything greater than 1 miles gentle driving will raise the temperature of the tyres sufficiently to prevent you from gaining an accurate reading.
Even better than experimenting is to use the "chalk method" to determine the best pressure for each tyre.
To do this, mark a line of chalk across the thread of the tyre, then drive slowly forward for about 20-30 meters before coming to a gentle stop, you may need to then roll the vehicle forward slightly to bring the chalk mark into view. If the line has been scrubbed out more at the centre of the thread your pressure is too high, scrubbed out more on both inner & outer means your pressure is too low. If it scrubs off only on one side or on one side and the centre leaving the other side relatively intact, then its time to get your alignment checked before going any further.
Before determining the correct tyre pressures (they will not necessarily all require exactly the same pressure) you really should invest in a decent pressure gauge (garage forecourt ones are notoriously inaccurate), this way you can check the readings at home before the tyres warm up, it will also help ensure that you obtain consistent results. This is a small investment that pays for itself by helping increase the longevity of the tyres and maximise mpg, not only on your Surf, but on any subsequent vehicles too.
Back to Index
All Models: Known to many owners as saggy arse syndrome, this occurs with age, as the rear springs become soft, this becomes even more pronounced under load. The only solution is replacement of the rear springs. Many take this as an opportunity to fit uprated and/or taller springs. To check, measure the distance from the centre of the wheel to the underside of the arch making sure the vehicle is unladen, if the rear is over 1/2 inch less than the front new springs are probably the answer.
When measuring for comparison purposes, always measure from the centre of the hub to the underside of the arch as this will give you the most consistent ant and accurate indication of the ride height. Measuring from the ground, will be affected by the type and size of wheels and tyres fitted, the remaining thread or the pressures in the tyres whilst measuring from the edge of the rim may be an inaccurate measurement especially when comparing to other vehicles due to the fitment of different wheels. Even some seemingly identical wheels can have slightly differing profiles.
Back to Index
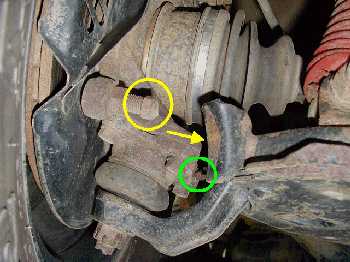
 1st & 2nd Gen only: The steering stops normally have a plastic cap fitted. These quickly wear and fall off, resulting in a variety of noises emanating from the front end, described as anything from a creaking to a banging when on full lock. Rather than continually replacing the caps most owners simply put a blob of grease on them (2 places each side). 1st & 2nd Gen only: The steering stops normally have a plastic cap fitted. These quickly wear and fall off, resulting in a variety of noises emanating from the front end, described as anything from a creaking to a banging when on full lock. Rather than continually replacing the caps most owners simply put a blob of grease on them (2 places each side).
Back to Index
2nd Gen: No problem, your 2nd Gen Surf is virtually identical to a UK supplied 4Runner, the chassis is identical, so any tow-bar listed as fitting a UK 4Runner will bolt straight onto your 2nd Gen Surf.
3rd Gen: No problem, your 3rd Gen Surf shares its chassis with the LWB Landcruiser Colorado/Prado (96-02 models), so any tow-bar listed as fitting these models will bolt straight onto your 3rd Gen Surf.
Back to Index
All Models: Here are a few places to get you started, try Roughtrax or Milner.
Also keep an eye on the forum, as members often have parts for sale. There are parts wanted & parts for sale sections in the HiluxSurf forums.
Back to Index
All Models: In many areas of Japan parking is scarce and spaces small, to assist parking manoeuvres these mirrors are fitted to all large vehicles intended for the domestic market. It offers a view of your nearside wing/wheel/wheelarch area to assist in close parking . Of questionable value.
Back to Index
2nd & 3rd Gen only: Commonly fitted is a rear wheel carrier. This hinges from the offside and latches to the tailgate. Many feel they improve the appearance of the rear end, but they do add an extra step in the procedure required to open the tailgate when access is required, something which may be of consequence if you need to do this frequently.
Note, there should be a pin attached by a cord which you can insert in the lower hinge when opened to lock the carrier in position. This will stop it swinging shut, and causing injury to you or your tailgate.
If your Surf does not have this type of wheel carrier, it is not a simple bolt-on procedure to add one. Those with the carriers have the offside rear pillar strengthened in the factory, there are also some differences in the tailgate. Models with the carrier do not have the necessary mechanism fitted to place the spare wheel underneath the vehicle.
Whilst some have successfully added the carrier, and others have removed it, its best to initially try to get the model which has the arrangement you require, as changing later is not easy.
Back to Index
1st & 2nd Gen Only: To open the tailgate, the window must first be lowered, either from the switch in the cabin or via the key-switch in the tailgate.
Swing open and secure the wheel carrier where fitted. Reaching in thru the open window, you will find a locking button to the left of the centre line, and the opening latch in the centre, pulling on the handle will release the tailgate, which then swings down.
When this tailgate is in the lowered position it is quite robust, and many use it to increase the effective length of their load bed, as a work-surface, or just for sitting/standing on.
A short word of caution, if carrying bulky loads, ensure they do not sit flush with the inside of the tailgate (or can’t slide all the way back during transit) or you may be unable to reach the handle to open the tailgate!
Problems opening? If the window suddenly won’t go down from either key or inside switch, check the wiper has parked correctly, as otherwise the window mechanism will be disabled.
3rd Gen: On the 3rd Gen things are somewhat simpler, just swing open the wheel carrier if applicable, grab the handle and lift. On this model you can still raise & lower the window using the key if required.
Back to Index | |
|
Copyright © 2005-2013 |